Table of Contents
- 4.1. Requirements
- 4.2. Tasks
- 4.3. The Menu Bar
- 4.4. Logging in to UDDI Services
- 4.5. Logging Out
- 4.6. Discover (Browse UDDI)
- 4.7. Creating new Entities
- 4.8. Custody Transfers
- 4.9. Publisher Assertions
- 4.10. Subscriptions
- 4.11. Using Digital Signatures in juddi-gui
- 4.12. Configuration
- 4.13. Language Codes
- 4.14. Switching Nodes
- 4.15. Adding Additional Language Translations
Starting with jUDDI v3.2, a nearly full featured UDDI v3 compliant web user interface is included called the jUDDI Graphical User Interface, or jUDDI GUI. It is also referred to as the jUDDI Console, or jUDDI User Console. The jUDDI GUI is a web application that can run in most web servlet containers, such as Tomcat and can be deployed along side of the jUDDI Web Services war (juddiv3.war). From the jUDDI GUI, users can browse, search, create, update, digitally sign and delete most UDDI entities, as well as preform custody transfers, configure subscriptions.
As of version 3.2, the jUDDI GUI supports the complete functionality of the following UDDI services
- Inquiry
- Publish
- Security
- Custody Transfer
- Subscription
The jUDDI GUI needs two things in order to operate.
- UDDI v3 compliant services
- A J2EE application server, such as Tomcat, Jboss, Jetty or maybe even in Winstone
- Optionally, a container level authentication mechanism that supports role based authentication (for remote configuration)
The following sections detail how to perform basic tasks using the jUDDI GUI. Hopefully, the user interface is intuitive enough that thorough guidance isn’t necessary.
Typically, the jUDDI GUI is accessed via a URL in a web browser, such as this: http://localhost:8080/juddi-gui. This URL will probably be different from this if someone else set up jUDDI GUI for you (such as a system administrator), in which case, you’ll want to ask them for the correct URL. Once loading the page, you should see something similiar to this.
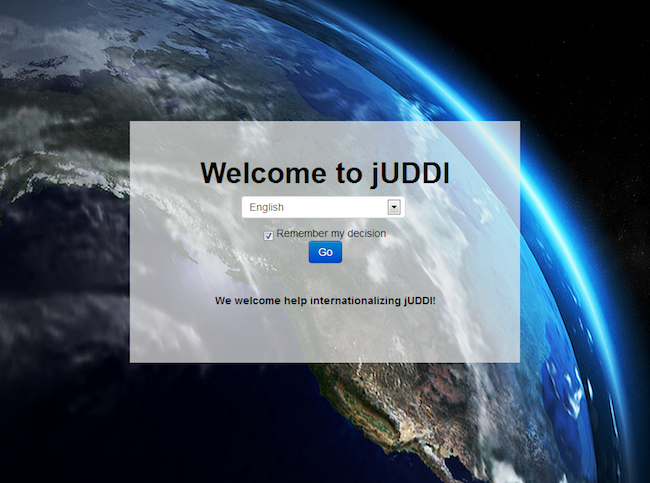
Select a language, then click the button labeled "Go".
Tip
Would you like to see the jUDDI-GUI in a different language that the one’s listed and want to offer some translation help? Please contact us!
Important
The juddi-gui stores your language preference as a cookie. No personally identifiable information is stored there.
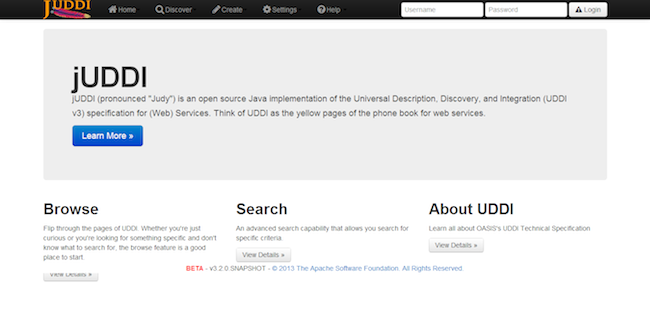
After clicking on "Go", you should see something similar to the next two screen shots.
Tip
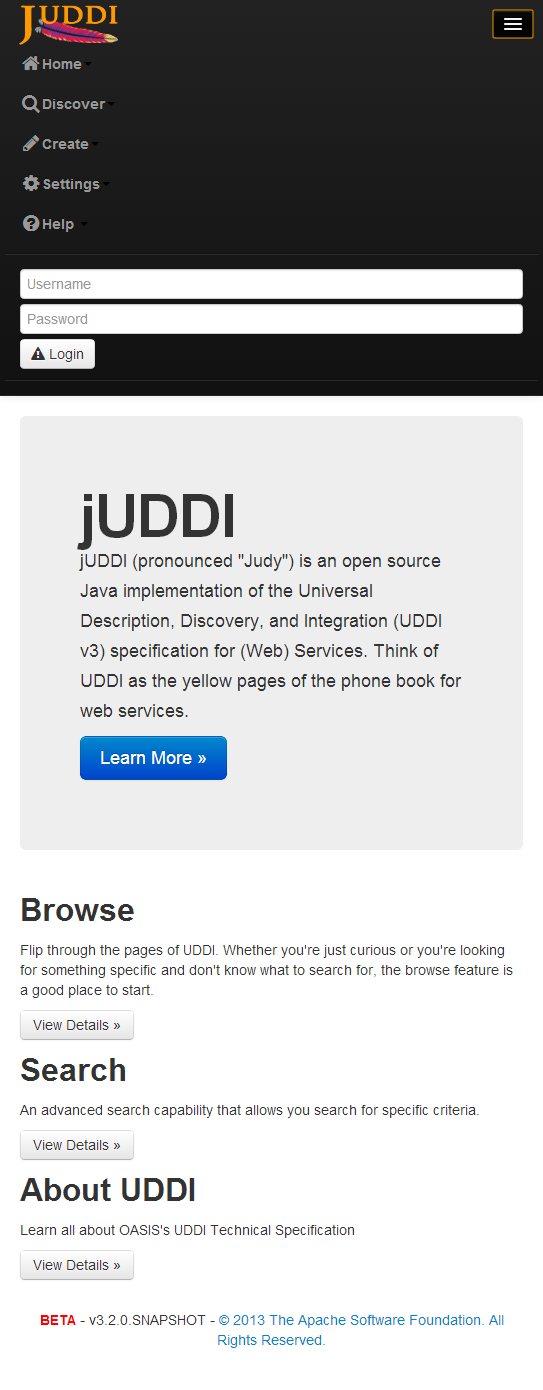
Why would it be different? The jUDDI GUI is based on the Twitter Bootstrap API and is designed to automatically rearrange the user interface based on screen size and resolution. Small form factor devices, such as tablets and smart phones generally function as normal, except that the upper navigation bar becomes condensed into a single button.
For now, let’s just focus on the menu or navigation bar.

The menu bar is designed to make navigation simple and intuitive.
- Home - This sub-menu contains links towards information that is tailored towards you, such as all the businesses you own, subscriptions, custody transfer, and publisher assertion (business relationships)
- Browse - This sub-menu makes it simple to find stuff in UDDI by letting you flip the pages of the directory.
- Create - This sub-menu makes it simple to create new UDDI entities, such as businesses, services, tModels, import from WSDL/WADL and some advanced operations.
- Settings - This page is typically access controlled and enables administrators to remotely configure the juddi-gui.
- Help - Contains links to the Internet for more help with jUDDI and source code access
- Login/Logout - many registries require authentication. These buttons support both HTTP and UDDI Auth Token style of authentication.
Assuming that your UDDI services require authentication, you’ll probably want to login with your username and password. This is done using the Login/Logout section the Menu bar (top right of the screen).

Caution
If you happen to notice that a warning symbol next to the Login button, use caution! Your password may be exposed if you proceed.
Tip
The Warning symbol on the Login portion of the Menu bar will be present unless the following conditions are met: Communication from your browser to juddi-gui is encrypted using SSL/TLS AND the communication from juddi-gui to the UDDI services is encrypted using SSL/TLS.
All of the Browse pages support pagination, that is you can flip through the pages of the database, as if it were a phone book.
In addition, search results can be filtered by language. On each Discover page, you will see the following
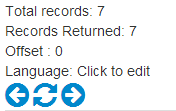
Click on "Click to Edit", enter your desired language code, then either press enter, or click "Ok" and the results will be filtered automatically. See "Language Codes" for more information.
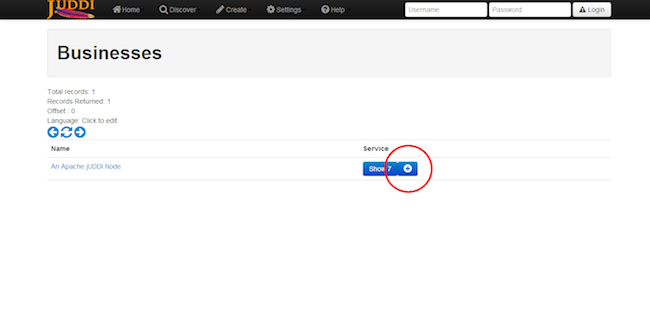
To browse for a UDDI Business, simply click on the word Discover from the top navigation bar and select Businesses.
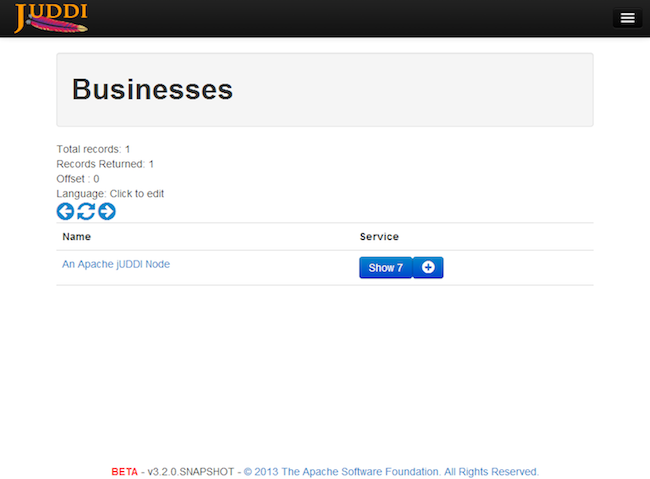
When clicking on "Show XX" (XX is the number of services that business has)
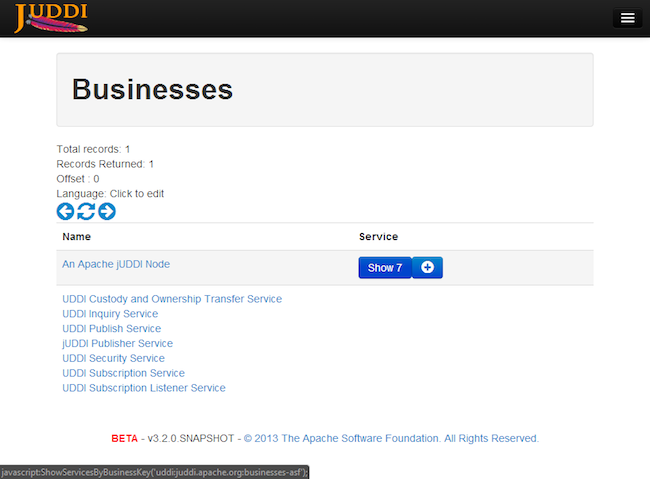
The (+) Plus button will enable you to add a new service that belongs to the business on the same table row.
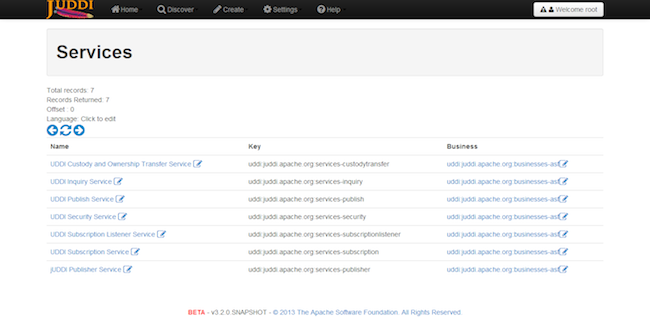
To browse for a UDDI Service, simply click on the word Discover from the top navigation bar and select Services. Clicking on the Name of the service, will bring you to the Service Editor page. Click on the owning Business key to bring you to the Business Editor page.
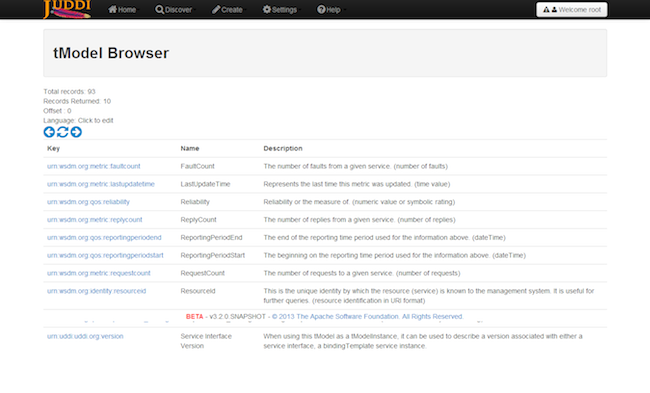
To browse for a UDDI tModel simply click on the word Discover from the top navigation bar and select tModel. Clicking on the Key of the tModel, will bring you to the tModel Editor page.
Searching UDDI provides you with the capabilities to make both simple and complex queries. To search, simply click on the word Discover from the top navigation bar and select Search.
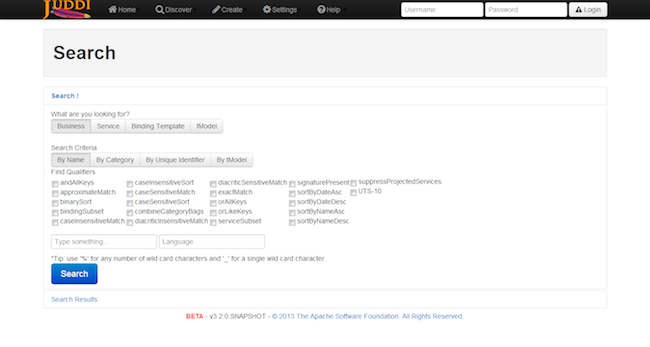
You first need to select what you’re looking for. You can either search a Business, Service, Binding Template, or tModel.
Tip
Not all combinations are valid. For instance, you can’t search for a Binding Template by Name because UDDI’s binding templates do not have names.
Important
UDDI offers a wider, richer search capability. The juddi-gui’s search page is in comparison, limited. If you have the need for more complex searches, you’ll probably have to write some code to do so.
Tip
When using the wildcards (%, ?), you have to add the find qualifier, approximateMatch.
The jUDDI GUI has the ability to create and register new UDDI entities.
From the menu, select Create, then tModel. For tModels, the only required item is the Name element.
Important
If you want to create your own UDDI keys (recommended) rather than use the not so user friendly server generated GUID values, then you’ll have to make a Key Generator first! Read on!
A tModel Key Generator is a special kind of tModel that enables you to define your own keys (for anything in UDDI) for your own "domain". A "domain" is similar to the Domain Name System used by the Internet to resolve user friendly names, such as www.apache.org, to an IP address. This effectively allows you to define any arbitrary UDDI key prefix that you want. For example, if you wanted a UDDI key defined as "uddi:www.mycompany.com:salesbusiness1", you would first have to create a tModel key generator (partition) with the value of "uddi:www.mycompany.com:keygenerator". TModel keys must start with "uddi:" and end with ":keygenerator". This is part of the UDDI specification and acts as a governance mechanism. You can also create a tModel Key Generator by using the Create tModel menu option and by adding the appropriate settings (assuming you know the secret sauce) or you can simply click on the word Create from the top navigation bar and select tModel Partition (Key Generator).
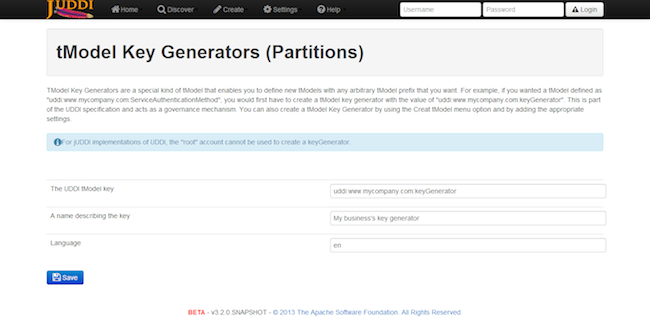
Tip
You can also use nested partitions such as "uddi:www.mycompany.com:keygenerator" and "uddi:www.mycompany.com:sales:keygenerator". UDDI uses the colon ":" as a separator for partitions. This will enable you to make UDDI keys such as "uddi:www.mycompany.com:biz1" and "uddi:www.mycompany.com:sales:biz2".
Tip
UDDI key names can be at MOST 255 characters long!
The UDDI Business entity enables you to define and advertise your business with a variety of ways. To create a new business, simply click on the word Create from the top navigation bar and select Business.
Tip
The "Create", "Business" page is also the same page to use when editing an existing business.
Businesses in UDDI only require you to define at least one name. All of fields are optional. Business entities can have 0 or more of just about everything. For now, let’s just make a Name, give it a Value and then save our new business. To add a new Name, click the "+" button next to the "Name". Then click on "Click to edit" next to "Value". If you make a mistake or wish to remove the "Name" or any other element, click on the trash can.
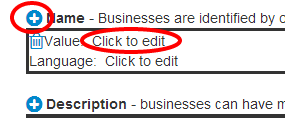
If you read the previous section on tModel Key Generators, then you know all about UDDI keys. This is your one and only chance to get it right. Once your done, click "Save". Congrats! You’ve just made your first UDDI business!
Important
When working with UDDI entities, you cannot change the UDDI key after it has been created.
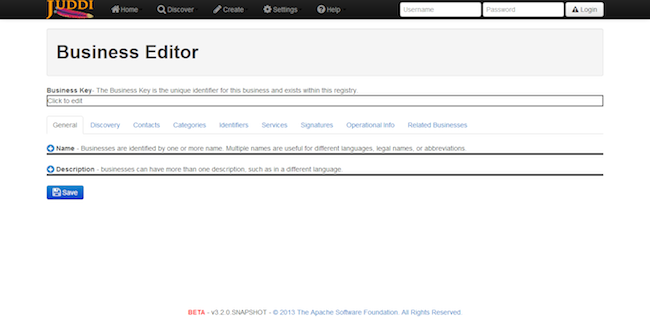
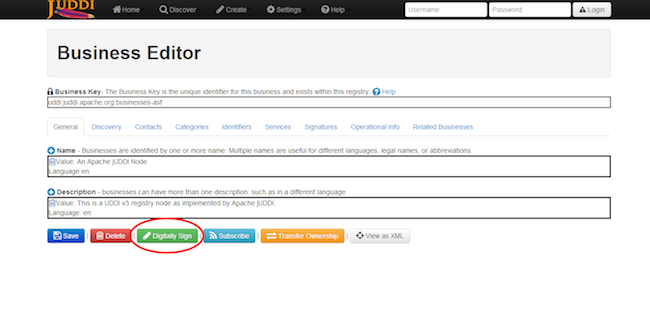
The Business Editor/Creator web page, along with the other editor/creator pages, has a ton of other interesting things that you can do. Since there’s way too much stuff to look at, we broke them up into logical sections.

In case you can’t see the picture above:
- General - Names and Descriptions
- Discovery URLs - Usually a link to a web page
- Contacts - Points of Contact, such as Sales, Tech Support, etc
- Categories - These reference tModels and act as a way to categorize your business.
- Identifiers - Can be used for Tax IDs, DUNS Number, or anything else that you can think of.
- Services - This is the meat and potatoes of UDDI, advertising all the great services that your business provides.
- Signatures - Digital Signatures prevent tampering
- Operational Info - Who created it and when
- Related Businesses - This is where people can find out if you have a business relationship with someone else. It’s also called Publisher Assertions.
Tip
Clicking on each tab will supply additional information.
Tip
If a business, service, or tModel is signed, the juddi-gui will automatically attempt to validate the signature. You’ll see a thumbs up or thumbs down icon to let you know.
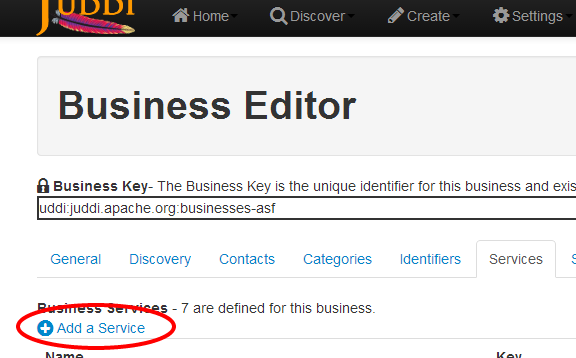
Creating a new service is simple so long as you remember that a service must be attached to a business. There are a few ways to create a new business.
The first option is to locate the business that you wish to add a service to via the Business Browser and then click the Plug button.
The second option is to bring up the Business Editor for the business you want to add a service to, then click on the Services tab, then "Add a Service".
Tip
Services require at least one name. Everything else is considered optional.
The jUDDI client provides programmatic access to convert a WSDL or WADL document into UDDI Service and tModel entries. The juddi-gui takes advantage of this and provides a simple to use interface to quickly and easily import your SOAP and REST services into UDDI.
From the Create menu, select Register Services from WSDL or WADL.
The process is pretty straight forward.
1.Provide the location of the WSDL or WADL file. It must be web accessible from the server hosting juddi-gui.war. If it is password protected (such as Digest, Basic or NTLM) provide a password to access the WSDL or WADL. Your credentials will not be saved anywhere. 1.The key domain. The imported UDDI service, binding, and tModels will all use this key partition/domain for key generation. The juddi-gui will populate this field with the domain of the URL entered in step 1. If you don’t like, go ahead and change it. One will be automatically created for you. 1.Pick a business to attach the imported data to. 1.Review and Approve. The Preview button will do all of the processing except saving the content, so it is a good way to get a preview of what will happen. Save will do the processing and save it.

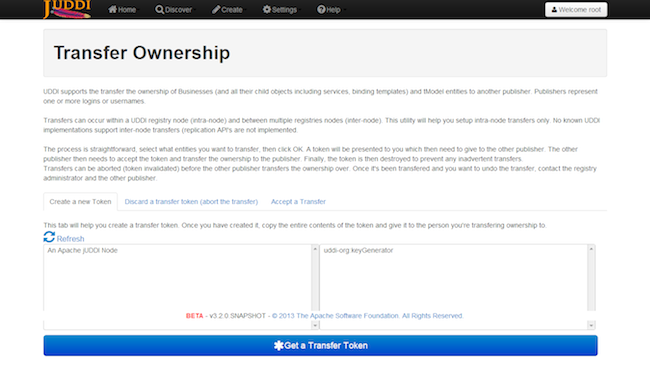
Custody Transfers are used to give away ownership and edit permission for UDDI business and tModels. It’s not used very often, but the workflow is simple.
1.Two business representatives agree to transfer either a business(s) or tModel(s) from business A to business B. 1.Business A creates a transfer token 1.Business A gives the transfer token data to Business B’s representative (perhaps via email?) 1.Business B accepts the token and transfers the ownership over.
All of these actions are processed at the Transfer Ownership page from the Home menu.
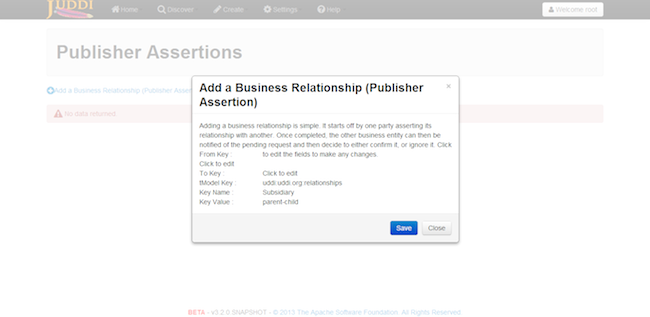
Publisher Assertions are how two different businesses can setup a UDDI Business Relationship. This essentially means that other users can see that this is a relationship between business A and B and that they can perform queries based on the relationship.
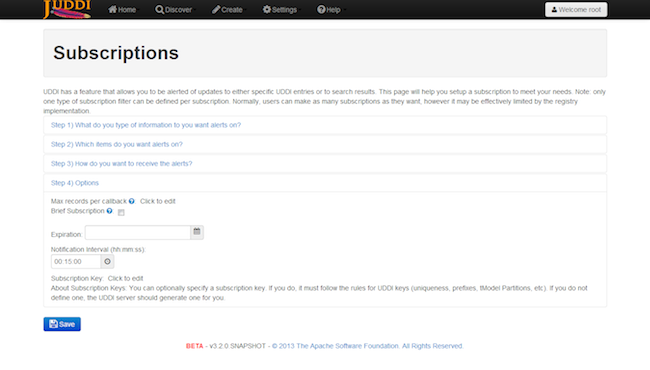
Subscriptions in UDDI are used to easily detect when changes are made to a UDDI node.
To create a new subscription, you must first be logged in. Click on Home, then Create Subscription.
Subscriptions can either be for a set of specific items or for search results.
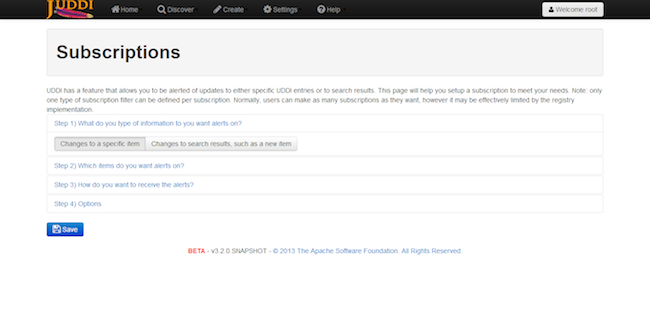
In our example, we’ve selected a set of specific items.
Create a Subscription, Select Items. image::images/juddi-gui-subscription2.png[Create a Subscription, Select Items
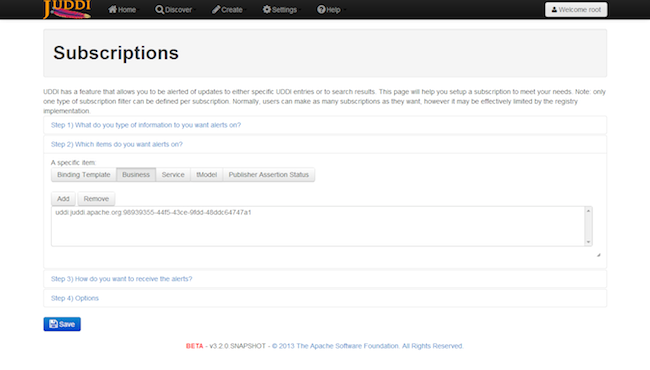
To add an item to the list, click on Add. The item chooser will appear. Check each item to add them to the list. To remove, select the item, then click remove.
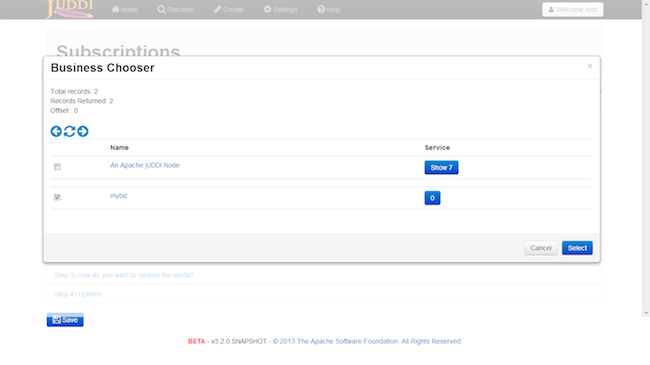
Specific items are added by entity keys.
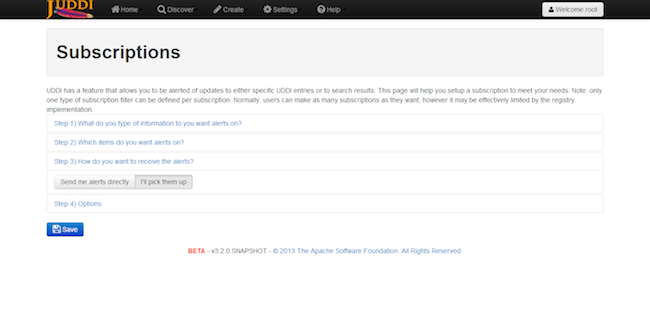
Next is the delivery mechanism. The UDDI node can deliver the notifications to you if you have your own implementation of the UDDI Subscription Listener service. (The juddi-client contains this for you if you were looking to develop a solution). In addition, the UDDI node can email the results to you (in XML format).
Tip
Since jUDDI 3.2.1, you can also configure jUDDI to send you a more human readable version of the subscription notification. To configure, all that is needed is to add a special transport tModel instance to your subscription binding, uddi:uddi.org:transport:userfriendlysmtp.
The other option is to periodically poll the UDDI server and get your subscription results (see the News Feed).
Here, we’ve selected the, I’ll pick them up, option.
The final slider provides subscription options. * Expiration - a date where the subscription expires * Notification Interval - this is only used when the UDDI node sends the notifications to you via the Subscription Listener Service * Brief - If true, the UDDI node will only tell you which items have changed, not what the change was.
To view, edit, and delete existing subscriptions, click on Home, then View Subscriptions.

The juddi-gui makes working with digital signatures simple and enables you do digitally sign and protect entities right from the web browser. It allows you to sign business, services and tModels.
Tip
Digital signatures are performed using the jUDDI Digital Signature Applet which requires a Java plugin for your web browser, as well as a digital certificate (X509).
Tip
You also need to have an X509 Certificate installed in either your Windows My/Current User Certificate Store or your MacOS Key Chain certificate store.
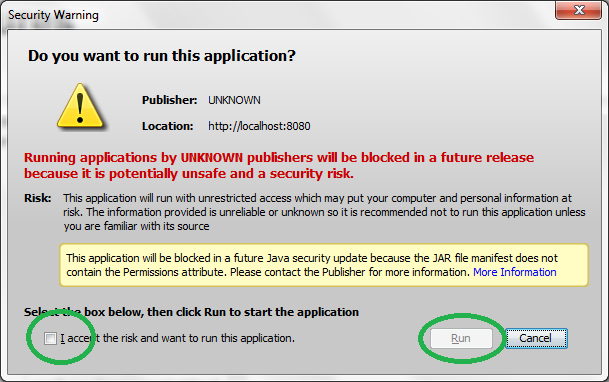
Select a certificate, then if you’re ready to sign, click on "Digitally Sign". This will automatically generate the signature and save it in the UDDI server.
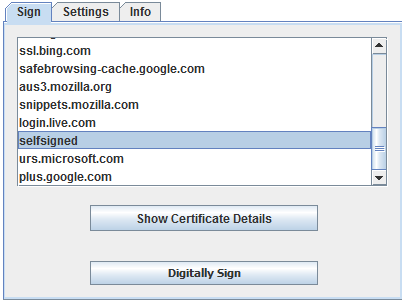
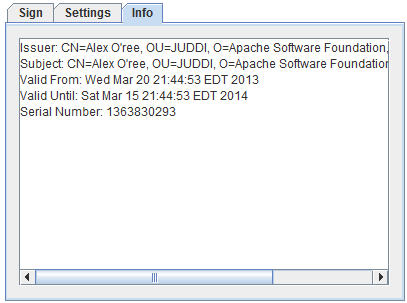
Click on Certificate Info will display the following panel. This is useful if you have a few certificates that are similarly named.
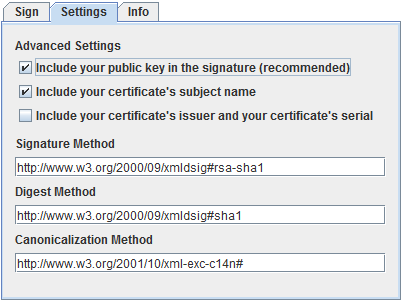
The settings tab gives you a number of options for advanced users. We recommend that you leave the defaults as is.
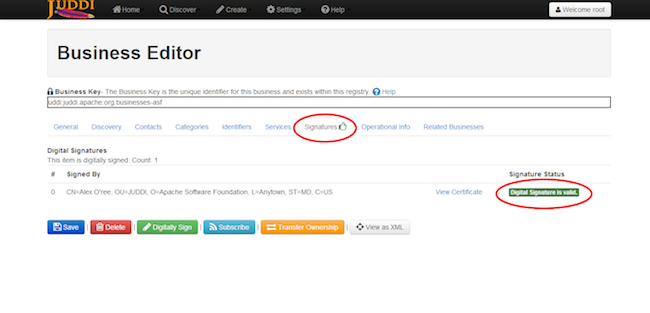
Once an entity is signed, the juddi-gui will always attempt to validate the signature and will notify you if its signed and whether or not its valid.
In the following example, the business was signed.
Important
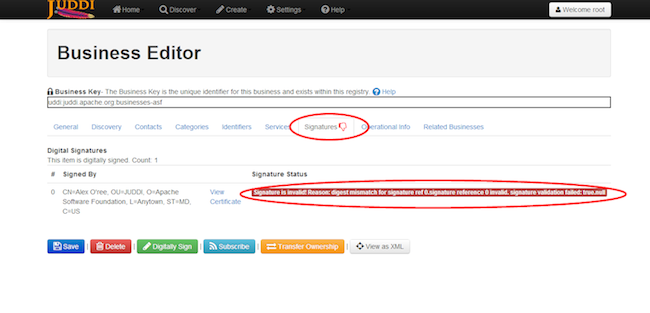
UDDI entities are hierarchical. A signed business entities includes all of the data for its services and binding templates. Any change to a service or binding template will cause the business’s signature to be invalid. TModels are not affected by this.
In the following example, one of the services own by the business was changed. Note that the signature is now invalid due to the alteration.
The configuration page is usually restricted to system administrators. There are many fields that are displayed. Some of the are editable, others are not. In general, the following settings can be changed (the others are just for troubleshooting and informational purposes).
Details on configuration is located in chapter, jUDDI Server Configuration.
Warning
Saving updates to the console configuration in juddi-gui/WEB-INF/classes/META-INF/uddi.xml will only work if the juddi-gui is deployed as a folder.
The Language Code is a field supported by UDDI that is inherited from the errata for XML Schema, which references RFC 3066, which can be read here: http://www.ietf.org/rfc/rfc3066.txt/. In general, Language Codes are either 2 or 5 characters but can by up to 26 characters. Here’s a few examples
- en
- en_US
- es_US
More can be found here: http://www.i18nguy.com/unicode/language-identifiers.html
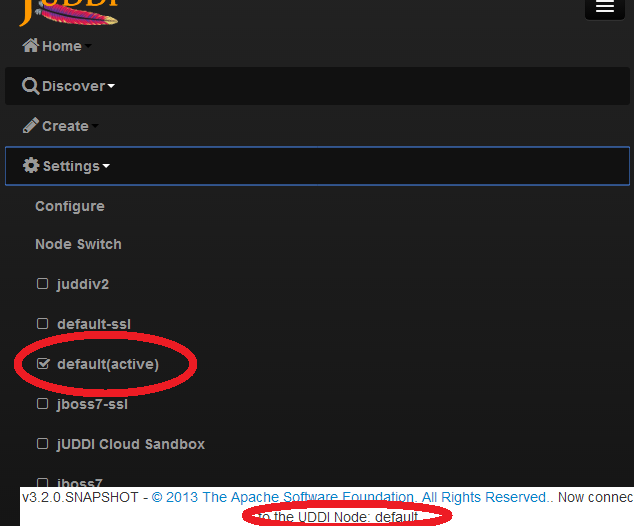
The jUDDI GUI supports connectivity to multiple UDDI nodes. A UDDI Node is simple a collection of UDDI services that are all connected to the same data source. Another way to put it this, a UDDI server. Each browser session to the jUDDI GUI has the ability to select the current Node connection. The current Node select is always saved as a cookie. To avoid any potential confusion, the currently selected Node is available both from the drop down Settings menu, and on the bottom of every page.
To switch nodes, simply select the desired node from the Settings menu.
Important
When switching nodes, any unsaved work that you have will be lost. You will also be logged out of the old node if you were signed in.
Tip
Administrators can define the default node via the Setting, Configuration page.
Adding support for a new translation is relatively simple.
- Identify what language you want to add (i.e. French)
- Identify the two letter language code (i.e. fr)
- Copy the default language resource file "web.properties" and name it "web_fr.properties".
- Edit "web_fr.properties" and translating each phrase as needed. It’s a standard Java properties file that uses the format key=value.
- Place this new file within "juddi-gui/WEB-INF/classes/org/apache/juddi/webconsole/resources"
- Edit the "index.jsp" file in "juddi-gui" to add the new line for the "fr" langauge code. It’s towards the bottom.
- Restart Tomcat or your application server and test.
Finally, contributions are always welcome. Either open a ticket with our issue tracker and attached the new translation or open a pull request.